

Please insert a disk into Removable Disk error in Windows 11/10
Afterward plugging in a removable drive or pen drive or any USB drive, if you encounter Please insert a deejay into Removable Disk message in Windows xi/10/eight/7, hither is how to fix that problem. Although sometimes this trouble gets stock-still by re-inserting the USB drive – if it is not being solved, yous tin can effort out the following possible solutions.

Please insert a disk into Removable Disk
i] Change drive letter
If the USB bulldoze is working fine with other computers except yours, y'all can try irresolute the bulldoze letter. If your calculator is causing the effect due to the drive alphabetic character conflict, it may prepare that instantly. For doing so, insert the removable disk and open File Explorer. You should observe This PC on your left-hand side. Right-click on it and select Manage. After that, click on Disk Management under Storage. If you lot see the removable disk in the list, right-click on it and select Change D rive L etter and P aths for [electric current-drive-alphabetic character].
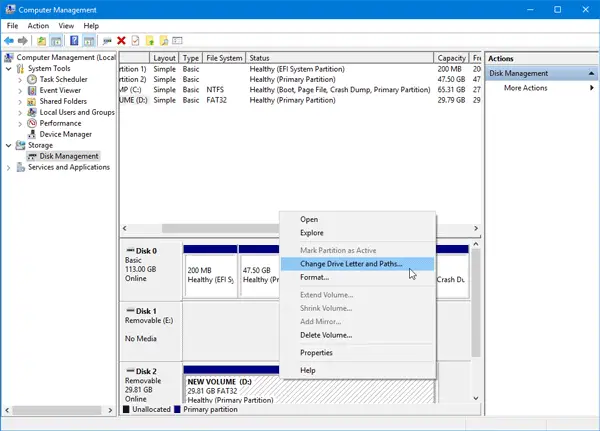
Following that, you volition see a Alter button that you need to click. Do that, select a new bulldoze alphabetic character and hit the OK push button.
Restart your PC and check if information technology is working or non.
2] Hardware and Devices troubleshooter
If you are using Windows 10, y'all will find the Hardware and Devices Troubleshooter in the Troubleshooters section of the Windows Settings Panel. Information technology will let you fix mutual hardware and external device related issues without additional effort. Printing Win + I to open up Windows Settings and navigate to Update & Security > Troubleshoot. On your correct-hand side, you will see the Hardware and Devices option. Click on the Run the troubleshooter button to open up the respective troubleshooter and follow screen options to fix basic bug. You may besides run the USB Troubleshooter and see if that helps you.
If your removable deejay is not being detected by any reckoner and all the Windows 10 machines are showing the same message, you lot have two options and those are mentioned beneath.
3] Format USB drive using Command Prompt
This solution takes a lot of fourth dimension but information technology solves the issue, as reported past many. If the removable deejay is displaying the same error message on various computers, you should format the drive using CMD. Earlier doing that, you should know that all your information will be lost one time you format it.
4] Delete Volume/Partition
Sometimes the existing sectionalization creates issues fifty-fifty afterwards formatting. In that example, you should delete the book or the partition. You tin practice that using Deejay Management.
Open Disk Management, right-click on the external bulldoze, select Delete Volume option.
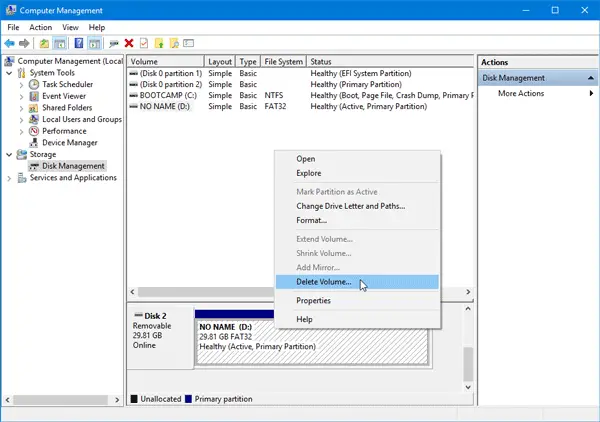
Adjacent, right-click on the same external drive, and select New Elementary Volume.
Follow the screen options to assign allocation size, drive letter, etc. After completing the process, reinsert the drive and check whether it is working or not.
Promise you will find these solutions helpful.
Related reads that may interest you:
- USB Device Not Recognized
- USB 3.0 External Difficult Drive not recognized
- External Difficult Drive non showing up
- USB Devices not working
- SD Carte Reader not working.

Source: https://www.thewindowsclub.com/please-insert-a-disk-into-removable-disk
Posted by: redfieldfoublinges.blogspot.com
0 Response to "Please insert a disk into Removable Disk error in Windows 11/10"
Post a Comment